Teacher's Guide: Colors!
Overview
This lesson introduces the concept of RGB codes, one of the methods to represent colors in a coding environment. Combined with iteration, RGB codes can lead to hours of coding fun.
Despite its apparent focus on colors, however, the lesson's underlying purpose is to provide more practice with variables and iteration, and to introduce the 'for x in' loop, i.e., a for loop with an explicit index.
More about the lesson
Color models
The concept of an additive versus subtractive color models will be unfamiliar to most students, though it is one they can quickly grasp, and find intriguing. The simple question, "What do you get when you mix red and green?", will not elicit many responses of yellow, unless the students are able to look at the handout beforehand. To further explain the concept, a useful analogy is to point out that in art class, you mix paint, and the more you mix, the darker it gets. But there is no paint coming out of the computer. It emits light.
Three additional points about rgb and rgb codes are worth mentioning. First, note that the rgb function does not appear in the Pencil Code coding blocks palette, so students will need to type it in text edit mode. Second, when all three color values are the same, the color generated is a shade of gray, ranging from black (rgb(0,0,0), i.e., "all the lights are turned off") to white rgb(255,255,255)). Finally, rgb function accepts any numeric arguments. Values outside the 0 to 255 range are changed to match the lower or upper bound of acceptable values (0 and 255, respectively), and rational values are truncated to whole numbers.
for loop nuances
The 'for x in' loop may seem to be simply a shortcut for what can already be accomplished with a basic for loop and an associated variable. In a sense, that is correct. For example, the coding block
for x in [0...10]
  #contents of loop
is equivalent to
x = 0
for [1..10]
  #contents of loop
  x = x + 1
However, the 'for x in' loop has broader applicability, as it can be used to iterate over arrays containing any data type, such as strings and sprites, not just sequences of numbers generated with range syntax, e.g., [1..10]. Students will first encounter this usage in the Arrays! lesson.
It is important that students make the connection between 'for' and 'for x in' loops. In particular, make sure students understand what is going on under the hood when they select the 'for x in' loop. As the preceding example illustrates, the coding block for x in [0...10] creates a variable before commencing the loop and increments the value of that variable at the end of each iteration.
Encourage students to think through why they would use one type of loop or the other, before they start coding. Do they need the value that is changing each iteration? If not, then the basic for loop would suffice.
It is also important to highlight and explain a subtle difference between the coding blocks for 'for' and 'for x in' loops: the former shows two dots in the range, and the latter three.
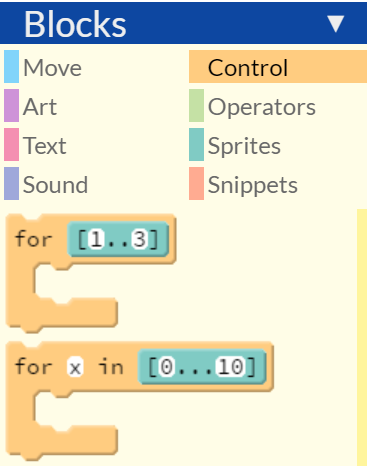
The issue here relates to range operators used to construct arrays. Students will begin to learn about arrays more formally in the Arrays! lesson. The .. operator denotes an inclusive range, which include the last value. Exclusive ranges, denoted with ..., always omit the last value. [1..3] is therefore equivalent to [1,2,3] and [1...3] is equivalent to [1,2]. The choice of range operator is a matter of preference; either one be used in either type of for loop. The inclusive range is arguably more intuitive, and appropriate for student use at this stage. The exclusive range, however, is broadly used in computer programming contexts, because it aligns with the enumeration of elements in an array. This features therefore becomes important when students encounter subscripting (but that won't be addressed until much later in the curriculum).
Variable names
As noted in the previous lesson, choice of variable name is an important style issue. Students should choose names that benefit the readability of code and are self-documenting, but they should avoid using excessively long names. Point out to students that the names chosen for illustration in the coding lesson could arguably be shortened, from myDiameter and myColor to diameter and c. In the latter case, note that students should also work to avoid name collisions, such as would occur if they used the variable name color: doing so would overwrite the built-in variable by the same name, which would affect the functioning of calls to random(color).
Notes to activities
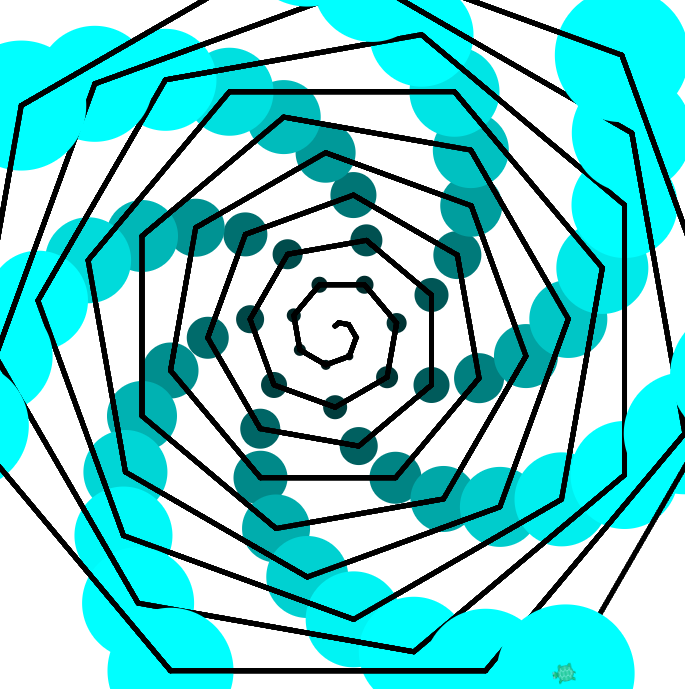
The lesson suggests solving the DotSpiral activity (and later the FadingSpiral activity) using calls to fd and rt in each iteration. An alternative is to make use of rt with two arguments. The key to the latter is that it is the second argument (specifying the radius) that should be increased on each iteration. With either algorithm, students may be tempted to change the turn angle as well. However, this leads in general to undesirable results—the spiral pattern breaks down after a number of iterations.
Students might gain additional insight into the spiral programs if they (temporarily) draw the dot spiral with the pen down. The following images illustrate FadingSpiral solutions constructed with the two algorithms discussed above:


Many students struggle to develop an algorithm for the Pizza activity. Assist them by encouraging them to break down the problem into smaller steps, beginning with drawing a single slice. Once they have done this, have them solve how to draw eight slices. It's best to have them wait until the final step to introduce colors with rgb.
Additional activities
Copy the code example on the Handout to make a GradientDot with many thin rings of gradually changing color. Explore different algorithms for computing the r, g, and b color components.

FadingSquiral: using a
for x inloop, code a spiral with straight sides that fades into the background. To accomplish the fade, make the pen thickness smaller with each iteration and make the rgb values either diminish to zero (for a black background), rise to 255 (for a white background), or asymptotically approach whatever rgb code combination matches the color you choose for the background.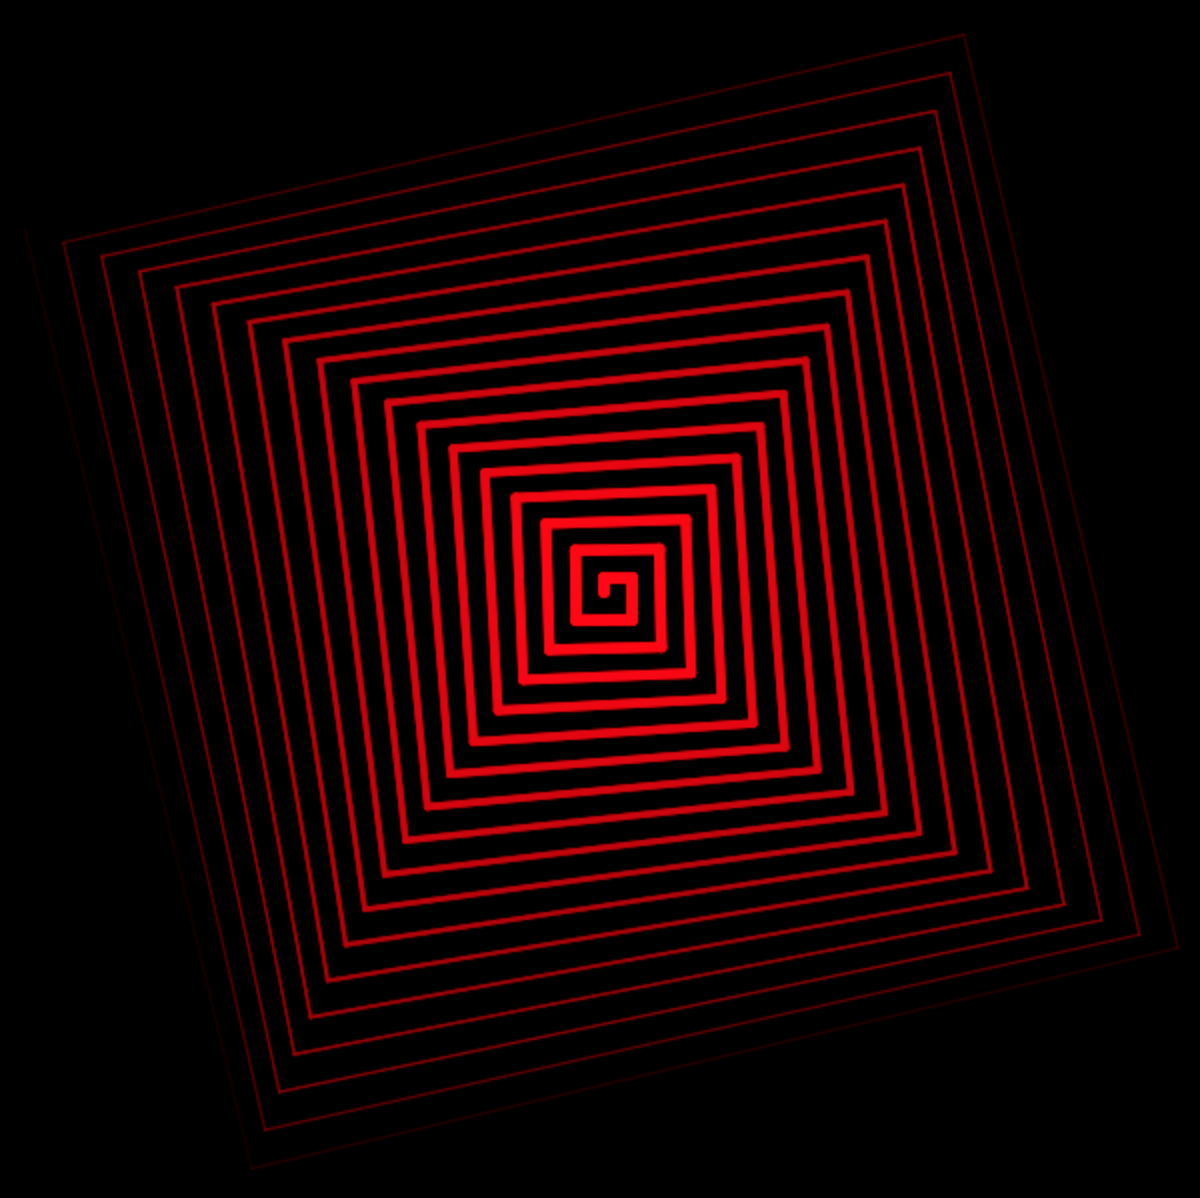
Use nested for x in loops to code a FadingGrid. Your code should include the following snippet, and your inputs to
rgbshould depend on the variablesrowandcol:for row in [1..rows] for col in [1..cols] #your code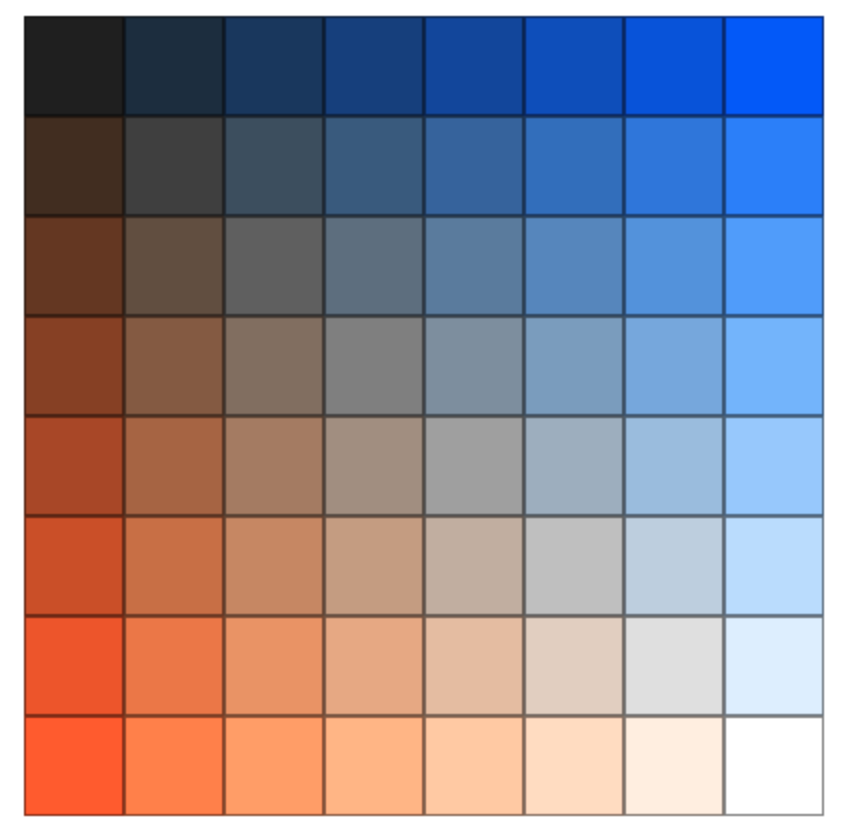
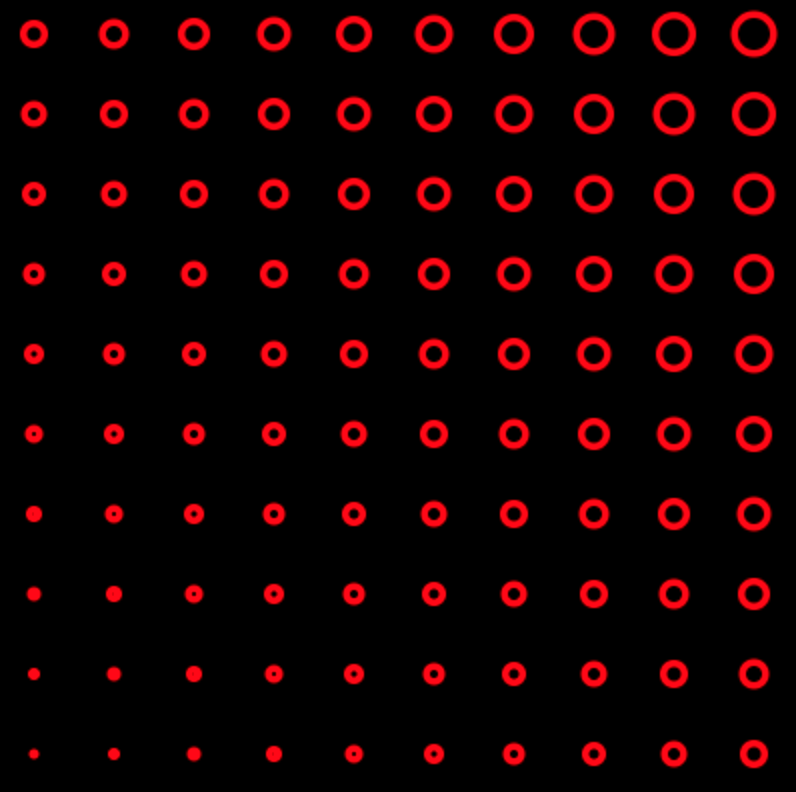
Use the same nested-loops logic as in the previous exercise to code a LotsOfDots program, in which the size of the dots (and perhaps also the color) depends on the row and column of the grid layout of the design.
Spikey: Make concentric rings of dots that change color and get smaller the further their centers are from the overall center. Do this using a nested loop (a loop within a loop). The inner loop should make a single ring of dots, using the sequence
fd-dot-bk-rtfor each dot. The outer loop changes the color and the distance from the center (repeating, perhaps, 256 times).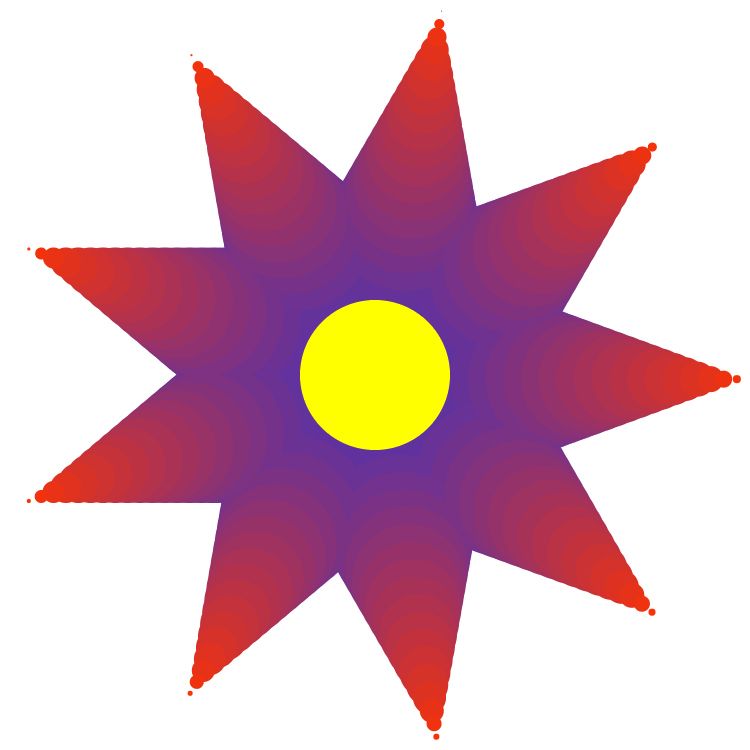
FadingEffect: Create a program that creates a fading effect by drawing very large dots with
rgbacolors with a low alpha. This has the effect of obscuring what has been previously drawn. For example, see FadingEffect or DivingTurtle.
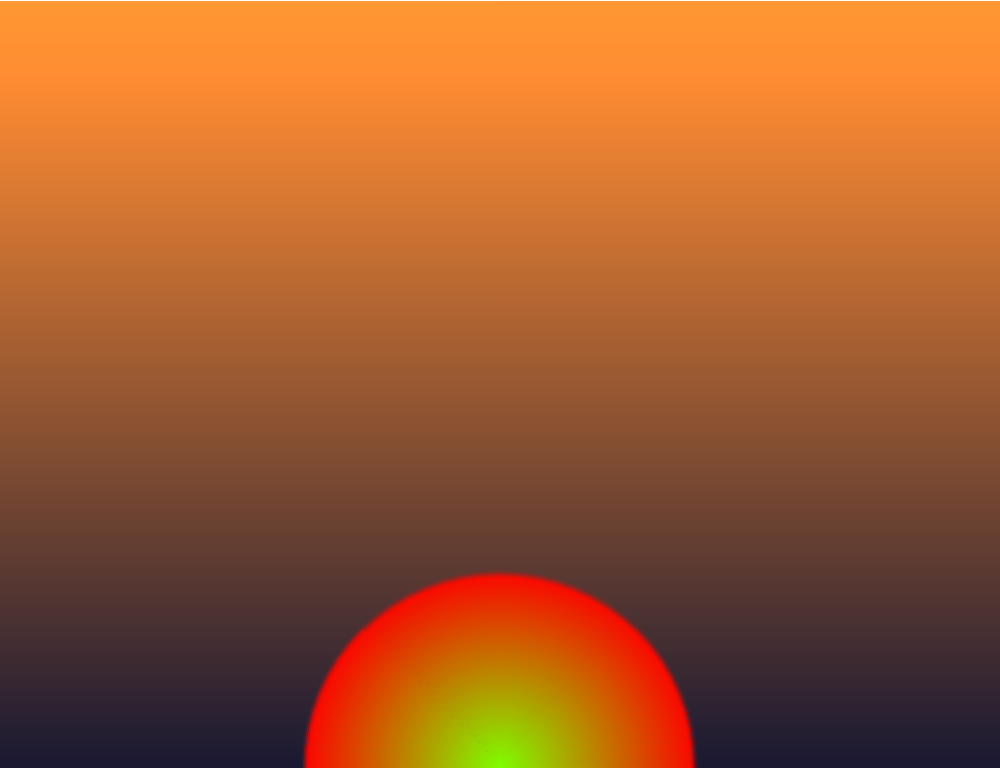
Draw repeated horizontal lines, each a little lighter than the one below it, to create a ShadedBackground. Tweak the rgb codes towards red or orange and add a fiery sun to turn this program into a Sunrise. Or, make a GloomyDayRainbow.
Code a program to create a Rainbow in which the colors gradually change through the spectrum, e.g., ROYGBIV. This activity can be solved rather trivially using the
hslfunction (described in the next section). The challenge here is to usergb.Use a for loop for each change of color (one for red to yellow, one for yellow to green, etc.). Hint: you can use dots of decreasing diameter as you cycle through the colors.
- red to yellow (by increasing the green component of rgb)
- yellow to green (by decreasing the red component)
- green to blue (decreasing green and adding blue)
- blue to magenta (adding in red)


Be aware that this rainbow activity is particularly challenging, and not an appropriate challenge for all. Those who do wish to tackle it may benefit from some help working through the color changes. One approach is to break up the color changes into four for x in loops:
While this algorithm does not actually yield ROYGBIV (among other things, indigo and violet are underrepresented), it is close enough to satisfy most students.
Beyond the lesson
RGB color represenatations
The Pencil Code color names reference shows the rgb codes for each predefined HTML color. This page also shows an equivalent hexidecimal (base 16) format. A discussion of hex goes beyond the scope of this curriculum (though it is not a big stretch, and students often find it "cool" to learn about). In short, suffice it to say that using web searches, students may come across different color representations, all of which can be used in Pencil Code. For example, a color such as darkgrey could equivalently be referenced by that reference, by the string '#a9a9a9', and by the function call gb(169,169,169). There is even an shortened version that uses fewer characters: '#a92' represents '#aa9922'.
A variant on rgb, rgba, adds a transparency variable called alpha. As alpha ranges from 0 to 1, the color changes from fully transparent to opaque.
HSL color represenatations
An alternative model for working with color is based on the light concepts hue, saturation, and lightness. Coffeescript provides the hsl and hsla functions to generate HSL colors.
W3Schools provides a user-friendly HSL color picker. Richer tools for exploring HSL and a detailed description of the HSL model (and the closely related HSB and HSV models, as well as others, such as CMYK) are provided by colorizer.org. Another comprehensive resource is provided by learn.leighcotnoir.com.
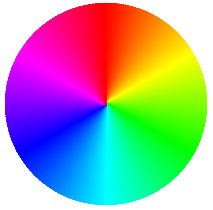
Calls to random(color) generate colors using HSL codes with 100% saturation and 50% light (rather than selecting from the list of predefined HTML colors). For example, the statement see random(color) might return hsl(350,100%,50%).
By iterating over values of hue from 1 to 360, one can easily generate a color wheel showing the 360 colors that can result from calls to random(color) (and clearly this would present a much easier solution to the ROYGBIV activity!).
Additionally, the HSL model facilitates choosing colors that are pastel or soft, as illustrated by the following script:

Variants on 'for x in' loops
'for x in' loops allow the addition of the modifier by following the range syntax, e.g., for x in [1..11] by 2. Additionally, when using range syntax, if the end value is less than the start, CoffeeScript will decrement in creation of the array. For example, [3..1] is equivalent to [3,2,1].
Why 0 to 255?
A widely-used standard for representating colors in code makes use of three bytes of storage, one for each component of color. Each byte has 8 bits, which in turn can store one of two values. As a result, there are 28 = 256 possible values for each component, which are represented with the values 0 through 255.
What can go wrong
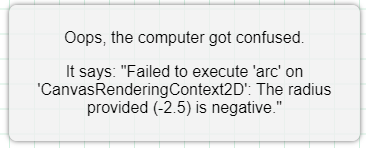
The coding activities in this lesson will likely lead one or more students to construct for loops that result in invalid arguments getting passed to animation functions such as for dot. This function does not accept negative arguments for diameter. Passing an invalid argument of this type will cause the program to crash and prompt this error:
Pedagogy
How to approach coding challenges
With each successive lesson, coding activities will become increasingly challenging, as new features are layered in on top of previous learned ones. This is unavoidable because, like mathematics, coding is a cumulative subject. This curriculum layers in new concepts at a measured pace, and provides the significant practice with new concepts that students need to fully master the material.
When tackling a specific coding challenge, however, students will tend to be more successful if they pause to consider strategies for solving a problem before they actually set to work at the keyboard. An important aspect of computational thinking which helps students is breaking down problems into smaller pieces. Consider the Pizza activity from this lesson. A common pitfall is to immediately try to work with colors (the lesson is about colors, after all!). However, a better strategy is to focus on the algorithm required to draw the finished product. This involves drawing the shape of a single slice of pizza. Once they've achieved this, they can put this code in a for loop that will draw the whole pie. Adding color is the last step.
Coding style
This lesson provides another opportunity to emphasize good coding style. Consider the following illustration for a dot with a color gradient:
for x in [0...256]
  r = x
  g = 256 - x
  b = 125 + x/2
  myColor = rgb(myRed, myGreen, myBlue)
  diameter = 256-x
  dot myColor, diameter

Of particular importance is how the red, green, and blue components to be used in rgb are defined prior to calling rgb. The alternative of putting all the code on one line, as shown below, makes the code less readable, and provide greater opportunity for difficult-to-catch syntax errors:
for x in [0...256]
  dot rgb(x, 256 - x, 125 + x/2), 256-x
Debugging
Debugging is a significant activity for any coder. When working with loops, it is often useful to be able to view the current value of variables that are modified during iteration, to ascertain whether the values are changing as intended. Because this curriculum has yet to introduce any sort of text output (and will not, for some time), students cannot print to the screen. Not formally introduced to students is the test panel, at the bottom of the standard display pane. The see function (a shortcut for console.log or debug) will print text to the console. Sharing this use of see with students is an easy way to meet this debugging need, without delving into text just yet.
The drawback to using see for debugging is that it shows all computed values for the entire program immediately, rather than reporting the results as the animation unfolds. This owes to the nature of the Pencil Code animation queue, a topic that we will begin to explore in the next lesson, Add More Turtles!.
Technicalities
String representations of colors
To be precise, rgb, hsl, and related functions do not actually create colors. Rather, they create consistently formatted strings, as illustrated by the test panel output below:
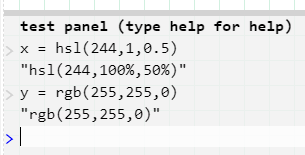
Pencil Code functions that expect color input interpret these strings and generate the actual colors on the screen.
Predefined color names
Pencil Code's predefined colors are stored in an array that can be accessed from the jQuery base object using the reference jQuery.turtle.colors, or, equivalently, $.turtle.colors. This fact will be shared with students in an optional additional activity listed in the Notes to the Arrays! lesson. These color names match the standard set of 140 CSS color names plus the CSS transparent property.
Compiling to JavaScript
As with basic for loops, CoffeeScript for x in loops compile to standard JavaScript for loops. For example,
for x in [0..5]
  dot random(color), 100-20*x
compiles to something along the lines of
var x;
for (x = 0; x <= 5; x++) {
  dot(random(color), 100 - 2 * x);
}
CoffeeScript's in ≠ JavaScript's in (and ditto for of)
The differences between CoffeeScript and JavaScript encountered thus far in this text relate primarily to syntactical simplifications, such as eliminating tokens such as parentheses and semicolons; in all cases the CoffeeScript syntax has been consistent with that of JavaScript. However, CoffeeScript's use of for x in marks a significant syntactical difference from JavaScript.
As with CoffeeScript, JavaScript also has a for x in syntax. Moreover, both languages also provide a for x of syntax. The complication is that their use of of and in in the context of for is essentially (though not exactly) reversed.
This lesson has shown how CoffeeScript for x in loops can be used to iterate over a range of values (e.g., for x in [1..5]). Later on in this curriculum (in the Arrays! lesson), students will learn to use for x in loops to iterate over the elements in an Array (e.g., for x in [red, blue, green]). After students have learned more about objects, they may encounter the for x of loop, which CoffeeScript uses to iterate over object keys (e.g. for key of turtle).
JavaScript's use of for x of and for x in is essential the reverse of how they are used on CoffeeScript. JavaScript uses for x of to iterate over the elements in an array, (e.g., for (const element of array) {...}). It uses for x in to iterate over the object properties (e.g., for (const property in object) {...}).
Comprehensions
In CoffeeScript, for x in and for x of loops can also be used to implement a classic coding idiom known as a comprehension.
Comprehensions are expressions that return a new Array from an existing iterable (i.e., an array or object). Using a comprehension, complicated code involving iterations can often be written in a single line. Morever, being expressions, comprehensions can be returned and assigned.
As an example, consider the following comprehension. It generates an array of cubed values of even numbers in the range [1..10] and assigns the result (the array [8, 64, 216, 512, 1000]) to the variable cubes:
cubes = (Math.pow(x, 3) for x in [1..10] when x%2 is 0)
In sum, for loop is a general-purpose flow-control statement used to execute a block of code repeatedly. Comprehensions are a convenient alternative to regular for loops that can be used when the goal of the loop is to create a new array from an existing iterable.
This curriculum will not make use of comprehensions, as they are not supported by JavaScript. (When compiled to JavaScript, CoffeeScript comprehensions are translated to code that relies on traditional JavaScript for loops.)