Teacher's Guide: Line Art!
Overview
This lesson intoduces four basic functions which provide students much greater potential to express themselves artistically while continuing to challenge them to think through puzzles algorithmically.
More about the lesson
The primary focus of this lesson is algorithmic thinking; the means to this end are the coding activities. The key to student success is getting them to recognize patterns. Don't be surprised if some students pick up the concepts and move through most of the activities quickly, while others, particularly students less familiar with basic geometry concepts, will require greater direction.
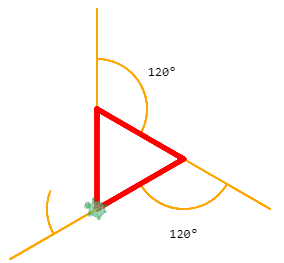
Asking students to help you to come up with code to draw an equilateral triangle will frequently lead to the pitfall described in the first bullet in the lesson's Math and Computer Concepts section, and can yield a rich and productive discussion. A resource that may be useful to futher illustrate the concept of exterior versus interior angles point is provided here:
As students work out solutions to the activities, encourage them to code mathematical operators to carry out computations (e.g., rt 360/4), rather than compute results themselves and type in the values (rt 90). This will help lay the groundwork for future use of variables, as well as yield the immediate benefit of improved self-documentation of code.
The pu and pd functions differ from other functions students have seen so far, in that they do not take an argument. As a result, to invoke these functions, they must be followed by parentheses, as illustrated in the coding snippet. (For more details, see What can go wrong notes, below.) .
Continue to encourage students to pay attention to good coding practices, especially with respect to file management and documentation. Instructor guidance is critical: the student with the innate inclination to pay sufficient attention to these habits is the exception, not the norm.
Notes to activities
Many of the activities for this lesson involve identifying a pattern. As illustrated in the "Math and Computer Concepts" section of the handout, the key to drawing regular polygons is determining how much the turtle needs to turn. Building from triangles to squares to pentagons, the goal is to have students realize that the turtle's turn angle should equal 360 divided by the number of sides.
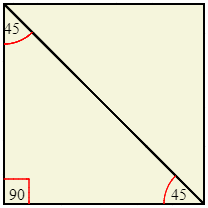
Before they start working on activities, students may benefit from a brief geometry review, if for no other reason than to get them thinking in terms of features common to basic, regular shapes. Squares are a good starting point, i.e., reminding students that squares contain four right (90°) angles. For triangles, students need to know that the angles in all triangles sum to 180°. For students who have taken Geometry, a review of the proof of this property could be worthwhile. However, for the purposes of this lesson, one can simply assert the property and demonstrate it for an isosceles right triangle (i.e., a 45-45-90 triangle) by bisecting a square diagonally:
Once students recognize the relationship between number of sides and turn angles required to draw regular shapes, point out that they can (and should) instruct the computer to perform computations, rather than computing and entering the result themselves. This approach has obvious value with respect to more complicated computations. For example, while it easy enough to compute 360/3 or 360/4, computing 360/5 or 360/7 is another story. More importantly, letting the computer do the math is actually also a good way to document the logic behind the code: "If you came back a year later, you may have forgotten your algorithm, especially if all you see is rt 72. But with 360/5, you have a hint to help you out." Additionally, the habit of using mathematical operators will benefit students when they reach the Variables! lesson, in which they will use variables in computations.
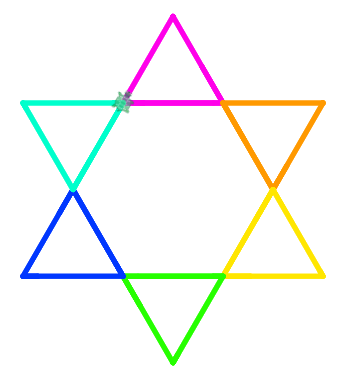
The six-sided star can be a particularly challenging exercise for novice coders. However, students greatly enjoy working through it, with guidance. Many will attempt to code this star the way they have likely learned how to draw it by hand—using a pair of opposite-facing equilateral triangles. However, this is a pitfall. Using this approach, students will likely revert to significant guess-and-check for the positioning of the triangles. Encourage students to derive an algorithm that doesn't involve guess and check. The worksheet example (which does not show the criss-cross pattern that results from the manual approach of drawing two triangles) is designed to make students think of directing the turtle to work its way around the outside of the start, alternating between left and right turns. Alternatively, students can draw a sequence of six equilateral triangles around the outside, like this:
This approach of placing equilateral triangles on the edges is an effective approach to make a star with any number of points, by placing a triangle on each face of a polygon.
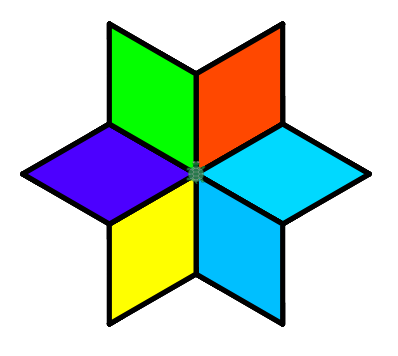
Another algorithm uses 6 rhombi (i.e., diamonds), drawn from the center in a rotational pattern:
For students who enjoy the PeaceSign activity, challenge them to take their work to the next level, by using multiple colors and outlines, as illustrated in this example:
Finally, note that some of the examples provided in the Handout (such as the pentagon and five-pointed star) have been oriented to look more aestethically-pleasing with respect to the page. Encourage students to first focus on drawing their shape, and then as a last step add code to orient the shape on the screen. This effort, in and of itself, can be a good computational-thinking exercise.
Additional activities
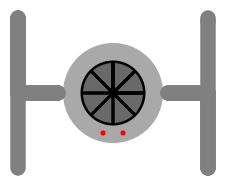
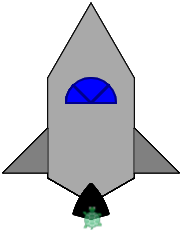
- Code a simple Rocket, or some other SpaceCraft.
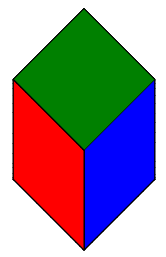
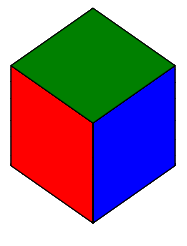
- Create a three-dimensional Cube. Vary the angles to give the cube a different perspective.
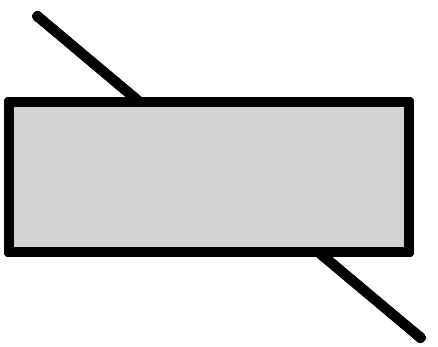
- LineIllusion: To most people, two ends of a diagonal line covered by a rectangle do not appear to line up. Code your own version of this optical illusion. Experiment with different slopes and different rectangles to see if it affects the illusion.
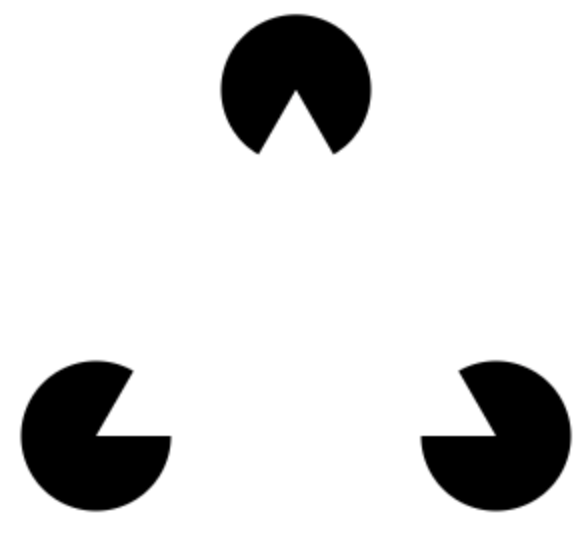
- The KanizsaTriangle illusion illustrates that our brains perceive objects as being whole even when they are incomplete, ignoring gaps and completing contour lines to form familiar figures and shapes. In the Kanizsa Triangle illusion we readily perceive a triangles, even though there technically is no triangle in the image. Hint: rather than drawing three "Pac Man" shapes, it may be easier to rely on
fill erase.
Beyond the lesson
Filling shapes will pen path
Not mentioned in the handout is that you can enter path as the first argument to the pen function. (This is not a item in the blocks menu, so it must be typed.) path is just a reference to the string "path". When this parameter is passed to pen, it causes the pen to be turned off and simultantiously marks the location of the pen call, recording the point to which the fill function will base its action on.
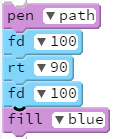

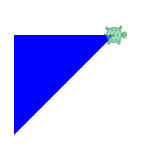
As illustrated above, use of pen path has the benefit of not having any line thickness at the edges, so shapes are true to the specified dimensions. From a teaching perspective, the drawback to introducing this functionality at this point is that the student cannot as easily see the shape being drawn, which complicates debugging.
Default pen args
Like most Pencil Code functions,pen can be called without arguments. The default pen, invoked will a call to pen(), is equivalent to pen black, 1. Single arg calls are also valid, such as pen red and pen 10.
Moreover, pen is quite flexible with respect to potentially valid arguments. For example, as an alternative to pu(), students can call pen false, pen off, or even pen transparent.
Additional pen args: cap and join styles
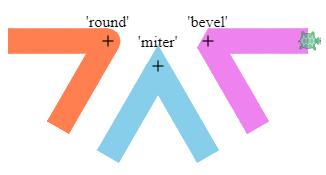
The pen function accepts optional third and fourth arguments, which can be used to set the line cap and line join styles. For example, this script by David Bau illustrates the three join styles:
These stylistic options are documented in the Pencil Code Pen Reference. At this stage, however, these options will overload most students. Keep this knowledge of these features in your back pocket, if a strong need arises. This curriculum will explore these features, but in the context of custom objects, as an activity in the Custom(ized) Objects lesson.
What can go wrong
Fill traces to most recent call to pen
There are two main student pitfalls in this section. The first involves fill, as students may not heed the note that the feature invoked by this argument fills in the regions traced since the most recent call to pen. Even if students don't run into this problem in this unit, it will almost certainly be a source of problems later on, such as in the unit on for loops, if the call to pen and/or to fill is included within the loop itself.
Omitting parentheses after function calls
The second pitfall involves the use of the pd and pu functions. The issue has to do with how Coffeescript recognizes function calls. In Javascript, function calls are indicated by the use of parentheses. One of the syntactical simplifications of Coffeescript is to do away with these parentheses, at least in most cases. Whenever a function is followed by an argument, Coffeescript infers that the user's intent is to call that function, so it compiles as if parentheses were typed. However, for functions not followed by an argument, Coffeescript will not invoke the function when parentheses are omitted. Technically, this is a logic error rather than a syntax error, so no error will be reported. This type of bug can be perplexing, because the code will run but fail to work as desired, i.e, the code seems right, and runs, but the results are off. Students may conclude that the underlying function itself has a bug, rather than their own code. Thankfully with a little guidance, the true problem is remedied easily enough.
Pedagogy
As noted above, the pedagogical focus of this lesson is on algorithmic thinking and building good programming habits. While the tools introduced in this lesson are simple, the goal is much more ambitious: having students explore mathematical relationships in their efforts to code familiar shapes. Ideally, let students uncover patterns on their own; at most, provide them hints to nudge them in the right direction. Students derive a great sense of satisfaction from working through the challenges on their own, and the lesson is likely to stick more, as well.
Exploring and reinforcing mathematical concepts is not a digression from coding. It enriches the experience, and benefits students' coding skills. Applying math concepts in a coding context makes them more relevant, and learning and engaging with these concepts in a coding context is exciting and fun.
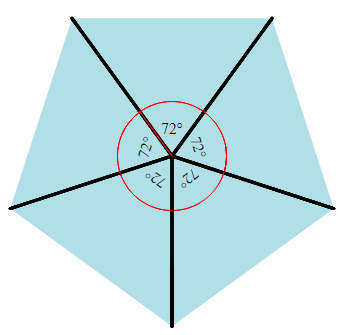
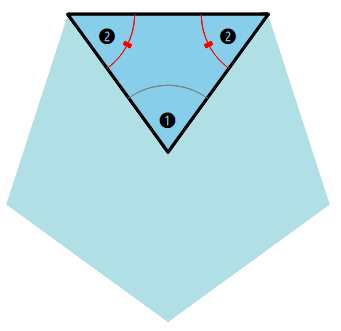
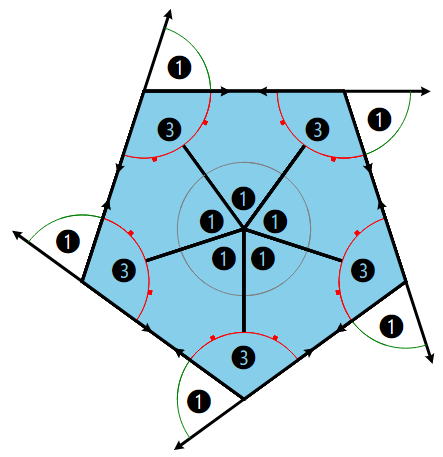
There are many more possibilities to expand upon the geometrical properties deduced in the lesson. For example, for a somewhat mathematically mature audience, to better understand how the math of a pentagon works, walk students through the derivation of angle measures, beginning with showing that the sum of angles formed from the center to the corners sums to 360. From there, it is straightforward, using conguency of angles, the angle sum property of triangles (angles sum to 180°), and the fact that supplementary angles sum to 180°, to derive that the turn angle for drawing a pentagon is the same as one of the interior angles, i.e., 360/5. In the diagrams below, twice the measure of angle 2 equals the measure of angle three. Hence, the supplement to angle 3 is angle 1.


Note, it is a small effort to extend this "geometry of the pentagon" to the "geometry of the n-sided star", and deducing that the formula for a turn-angle in an odd-pointed star can be computed as 180-(180-2x360/n), or in simplified form, 2x360/n.
In this and subsequent lessons, discourage students' inclinations towards guess-and-check. Through examples such as provided in the activities in this lesson, demonstrate the power of using math to inform their coding. Guess and check will work for the Pentagon activity (though don't be surprised if you encounter a number of slightly-irregular shapes, with turn angles slightly different from 72°). If you need to convince students of the benefits of "letting the computer do the work", challenge them to draw a heptagon. Few students will likely guess their way to the (appropximately) 51.43° turn angle needed.
The emphasis on math, as well as on good coding practicies, is intended to lay the groundwork for future work. The benefits will become more apparent in subsequent lessons. We are laying the groundwork for future lessons, notably when we use iteration and variables, at which point we will point back to this lesson and help students make the connections. For example, when we get to variables, students will come more fully to appreciate that 360/sides not only is easier, but it is self-documenting as well.
Technicalities
As noted above, one common student pitfall is to omit parentheses after function calls when the function does not require an argument. The simplest solution to this is to follow the function call with an explicit set of parentheses, e.g., pu() rather than pu. A second solution to this stumbling block is to use the do function. do takes a function as its argument: do pu is equivalent to pu().
This book will not use do syntax. However, this use of do does provide an initial glimpse of the fact that in Javascript, functions are objects, and as such can be passed around as any other object, including as the argument to a function. This powerful feature, known as first class functions, will be revisited much later in the course, after students have worked through lessons on defining custom functions.
The need for the use of parentheses following functions that don't take arguments relates to their status as special, callable, objects. When a function is followed by a value, Coffeescript interprets that value as an argument to that function, and therefore treats the expression containing the function and argument as a function call, which it then executes. For functions without an argument, the parentheses are needed to signal to CoffeeScript that the function isn't just being referenced in the expression, but that it should be executed.
