Teacher's Guide: Format Labels!
Overview
A primary goal of this lesson is to use the context of creating formatted labels to continue to reinforce the use of objects as a means to organize information and pass it around within a program. A second significant goal is to introduce students to the fundamental components in web design: content/structure, presentation, and behavior. Within this vast topic, this lesson focuses on the presentation layer, CSS, short for cascading style sheets.
More about the lesson
The Pencil Code coding platform foregrounds the use of the scripting language CoffeeScript (a simplified offshoot of Javascript, which compiles to JavaScript before being run in the browser) while largely shielding students from the underlying HTML and CSS that play such large roles in constructing web pages. This approach has much to recommend it, as will be discussed in the pedagogy section of this document, below. However, students ultimately need to understand these other aspects of web programming to unleash their full coding potential.
The lesson begins by referencing HTML because it provides the structure and content for everything visible on the screen. Yet, students continue to only need a high-level understanding of HTML at this point. Specifically, they need to understand that web pages are made up of a collection of HTML elements, and that each label they create is an HTML element which can be formatted separately using the style sheet language, CSS.
CSS is a language that describes how the information embedded in HTML appears on the screen. This powerful and flexible tool can be incorporated into web pages in a variety of ways: directly in the underlying HTML code via the style attribute; indirectly via references to associated .css pages; or dynamically, such as via Javascript.
Using CSS, developers can override HTML elements' default formatting settings along various dimensions: CSS attributes can be applied to an individual element in the page (e.g., a specific label created with the label function) or to a class of elements (e.g., all sprites). Depending on the approach taken, these attributes can be established before the page first renders, or it can change based on user interaction with the rendered page (e.g., clicks or keyboard presses) or other system and network inputs.
In this lesson, students take a significant step towards more directly manipulating the underlying features used to control formatting and style. Previously, students influenced formatting features of HTML elements, but in a very indirect way. In the case of Turtles and other Sprites, they have used functions, such as moveto, grow and wear to affect placement, size, and/or background-color of underlying HTML elements. They have also used arguments in constructor calls to reach similar ends. In the case of label, students have specified font size via that function's second argument.
CSS (declaration blocks) versus Javascript (objects)
This lesson instructs students to format labels by passing objects containing CSS declarations as a second argument to the label function. Technically speaking, students will be using a slight variant of standard CSS notation. As the lesson notes, this step is taken for the CSS properties "to work within Pencil Code."
The differences between the nomenclature and syntax of CSS settings and how they are structured and referenced in JavaScript can initially cause confusion and will inevitably lead to a number of coding bugs. It is essential that the differences get addressed, because students will need to be able to look up CSS features—using online references such as w3schools.com—and appropriately reformulate what they find into a form suitable for use in JavaScript. Thankfully, the differences are logical as well as consistent and ultimately will pose little challenge.
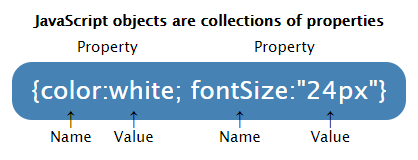
The following diagram contrasts CSS declaration blocks and JavaScript objects. Declaration blocks are comprised of one or more declarations, each of which consists of a property-value pair. JavaScript objects, in contrast, are comprised of one or more properties, each of which consists of a name-value pair.

Thus we see that CSS uses a different nomenclature to describe the structure of the data saved in it. CSS declarations correspond to Javascript object properties. CSS property-value pairs correspond to Javascript object name-value pairs. Thankfully, the structures are quite similar; the primary confusion arises when trying to talk about their specific components, especially for students new to these concepts.
When referenced in JavaScript, CSS property names and values must be expressed differently. The issue is that the hyphen serves as the subtraction operator in JavaScript and thus cannot appear in a script unless as part of a String. When using CSS properies and values in JavaScript, one option therefore is to enclose the CSS term in quotes.
When referencing CSS property names in the JavaScript context, a conventient alternative to quoted strings is DOM notation. The DOM (short for Document Object Model) is the structural framework created by the browser when it processes an HTML file. DOM notation simply replaces the hyphenated term with its camelCase alternative. Thus, as illustrated above, the CSS declaration value font-size can be referenced in JavaScript with the object name fontSize.
CSS values that include non-numeric data must likewise be referenced as strings. In the following example, "24px" is a good example. Note that the value corresponding to color, white, is acceptable because it is a built-in variable that references the string "white" (so, effectively, that value is represented by a string too).
Units
Though not directly mentioned in the lesson, CSS units may require some explaining as well. The lesson notes that property names and values must correspond to valid CSS options and settings. There is often some flexibility here. For example, the width property illustrated in the coding snippets is paired with a Number value, 200. However, one could also specify a string that also includes units, "200px" ("pixels", a system-dependent setting, the default unit), "0.667in" (inches), or "12.5em" (a unit matching the width of the letter m in the current font size).
w3schools.com provides details about these relatative and absolute units of length. w3schools.com also provides this pixel to em converter. While "pixels" is a common default setting, that is not the case for all properties. For example, line-height is specified in terms of multiples of the "normal" line height for the current font-size, though one can also specify a fixed line-hieght by including a unit, e.g., "100px".
Notes to activities
ShadowLetters requires students to use a formatting object to set the color. Other than size, students might set fontWeight and fontFamily. Care must be taken when choosing a font family to ensure that it is available in the user's browser. The five generic font families 'serif', 'sans-serif', 'monospace', 'cursive', and 'fantasy' should be always available. For more variety, students might search for web safe font families. This resource from W3C can help identify a much broader selection of fonts that will work in the current browser. Finally, remember that, in Javascript, all font names must be enclosed in quotes, e.g.,:
fonts = ['Arial',
  "Verdana",
  "Comic Sans MS",
  "Impact",
  "Courier",
  "Georgia",
  "Times New Roman"]
The illustration for ShadowLetters includes characters not found on a standard US keyboard. There are a variety of ways to access more extensive keysets. Arguably the easiest in this environment is to use predefined HTML codes, such as ÷ for ÷. The characters used in the example are listed in this w3schools.com UTF-8 Latin Supplement (Character sets and encoding were described in the Notes to the Add Text! lesson.)
In the instructions for ColoredLabelsCSS as well as for some subsequent activities, the CSS property name is provided (background-color), rather than the Javascript friendly "DOM-notation" variant. Students need to convert to the latter (e.g., backgroundColor) for their code to work. This approach was taken for pedagogical reasons: students will more typically encounter CSS syntax when researching CSS properties, so they need to get in to the habit of translating.
As they work through ColoredLabelsCSS, students will likely notice that some colors are so dark that the labels don't stand out from the background. A nice extention to the activity is to add conditional logic to change the font color to something other than black when illustrating a very dark color (such as black), so that the color name will always stand out.
When coding ROYGBIV, students may opt to use "guess and check" to approximate how much to move between letters. If they take this approach, they may benefit from using a fixed-width (monospace) font familty, because that way they can move a constant amount each time. Alternatively, by setting the width property for each new label, students can get the spacing exact with any font choice; this also facilitates using the backgroundColor property (rather than drawing equal-sized colored boxes behind each letter).
Additional activities
Some of the following activities use labels to create graphical shapes. To use label for this purpose, set the first argument to "", and add style attributes for width and height to give it size.
The
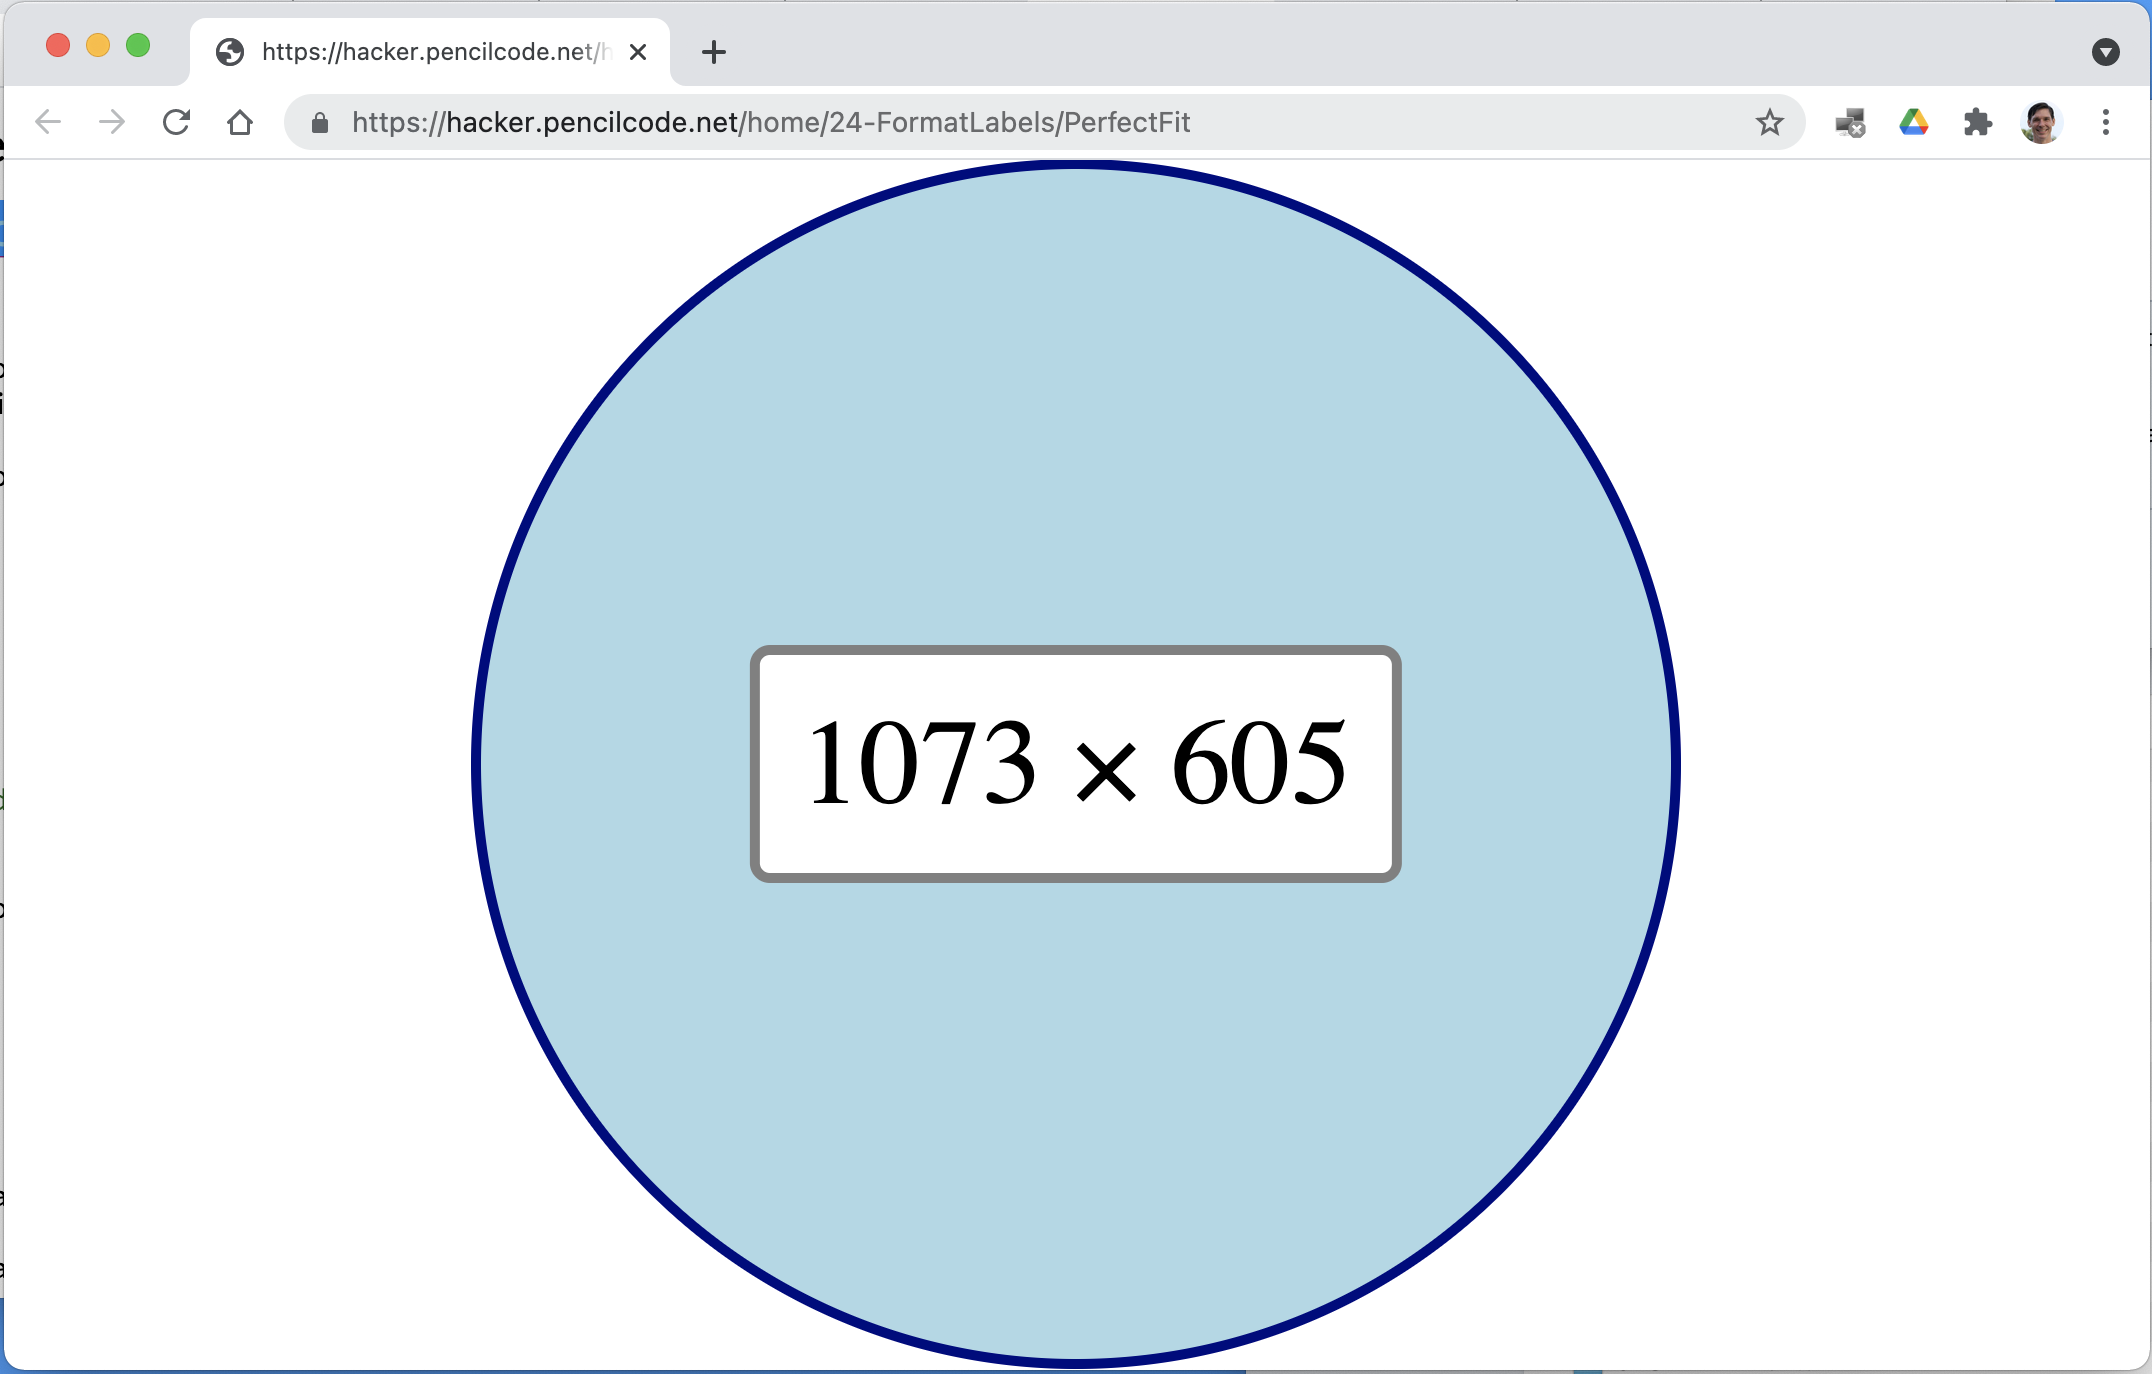
borderRadiusproperty allows you to smooth the corners of a label (look it up!). If you smooth the corners to"50%"and simultaneously setheightandwidthto the same value, you'll generate a circle. Code a new variant of the PerfectFit program (originally created for Array Destructuring!) which creates the dot using a label rather than relying on thedotfunction. Add a second label that lists the screen's dimensions.By setting a label's
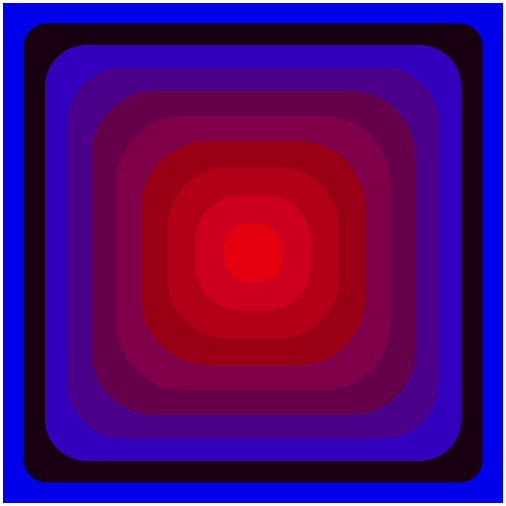
border-radiusto"100%", you can draw an elliptical shape. If theheightandwidthproperties are set to equal values, you'll get a circle; make them uneven and you can draw an oval. Use this knowledge to code a DozenEggs.Evolution: Write a script that draws a sequence of labels that shows the effects of taking
borderRadiusfrom0%to50%.For this task, students will need a label with (a) no text content, (b) non-zero
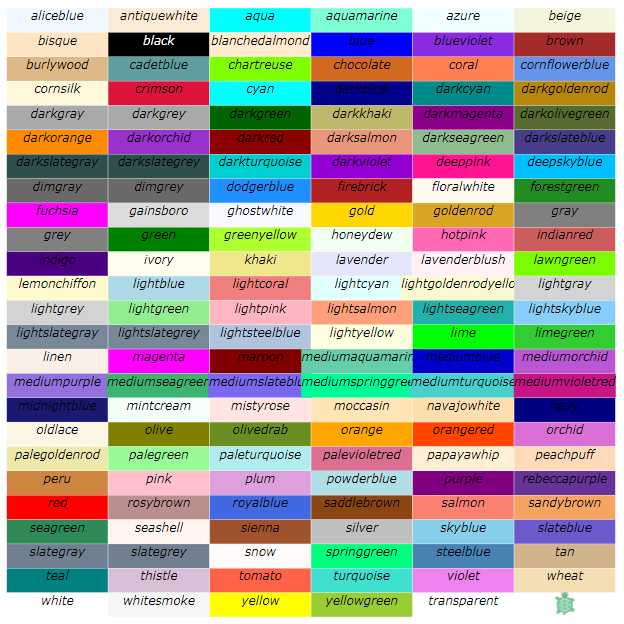
widthandheightvalues, and (c) a non-whitebackgroundColor.borderRadius:"5%"softens the shape just a little bit;borderRadius:"50%"yields in an elliptical shape. Ifheightandwidthare set to equal values, you'll generate a circle, otherwise the result is an oval.- Extend the ColoredLabelsCSS program to create a ColoredLabelsGrid. Use a nested loop to draw a grid with all 149 predefined colors.
- Create one or more Buttons to use in future programs. Use the
background-colorandborderproperties to add style, and useborder-radiusto round the edges (the examples below haveborderRadius: 20). Beautify your button withtext-shadow,box-shadow— whatever suits your fancy! If need be, do a web search to find out more about usage/syntax for each property.
Beyond the lesson
HTML
While this lesson is primarily about formatting and using objects, it begins by referencing HTML. This is because HTML is the most basic building block of the web. Everything we see in a rendered web page begins with HTML. It provides the underlying structure and content. CSS is a language that desribes how the information embedded in HTML appears on the screen. Using CSS, developers can select options to change the default presentation of the HTML elements.
To better understand CSS, it is useful to take a step back and better understand the HTML underlying Pencil Code labels. Each HTML page consist of a set of HTML elements. These elements are defined using HTML tags. There are various types of tags, each of which has different default characteristics . For example, the <body> tag is used to establish the visible page, <div> tags are often used to divide a page into sections, and <p> tags are used to demark a paragraph of text. Default characteristics of HTML elements can be modified using html attributes.
As an example, consider the following code, which creates a page with a single line of text:
<html>
  <body>
    <p>
      This is a paragraph.
    </p>
  </body>
</html>
As this simple example illustrates, the HTML page consists of a number of elements, each defined using an HTML tag. The outermost element is the <html> tag, which tells the browser that this is an HTML document and also serves as a container for all other HTML elements. The <body>
<p>, or paragraph element, used to hold text content.
HTML tags often have additional attributes which one can specify in order to provide additional information relevant for that tag. For example, to create a hyperlink to another web page, use an anchor tag (<a>). The coder specifies the target URL in an href attribute.
  <html>
    <body>
      <p>
        This is a hyperlink to
        <a href="https://ref.pencilcode.net/turtle/colors.html">
        the Pencil Code colors reference</a> within a paragraph
        element.
      </p>
    </body>
  </html>
For the formatting goals of this lesson, the style attribute is most important. Recall that web browsers render HTML pages based on default styling settings, such as left-aligning text and using a black font, unless directed otherwise. Users can specify different formatting using CSS, the language designed to be used with HTML for that purpose.
One way to modify the formatting of text on screen is to embed CSS code within HTML tags using the style attribute. This is essentially what the label function does when creating formatted labels:
<html>
  <body style="background-color:beige">
    <p style="font-size:50px; border: 1px solid black;
                  padding:1ex; background-color:cyan">
      This is a paragraph.
    </p>
  </body>
</html>
CSS formatting settings can also be applied to all elements of a given type or to all page elements that have certain characteristics. This is one of the features of CSS that make it so powerful. Initial CSS settings for an HTML document are typically applied using CSS declaration blocks. These are typically saved in one or more external .css files and read into the current document when it first loads and renders based instructions in the HTML document header.
One can also set and/or change CSS setting for individual page elements or groups of elements programmatically. This process is facilitated by the JavaScript library jQuery, and is the focus of the following two lessons, Label Recycling! and Calling all $(".turtle")s!.
The foregoing discussion in this section encompasses more information than students need to know about HTML and related tools at this point, but is provided because it will ultimatly be key to fitting all the puzzle in the interconnected web programming languages HTML, CSS, and JavaScript. In this lesson, students specify the style properties by passing a formatting object to the label function as a second argument. In the following lesson, Label Recycling!, students learn how to dynamically change label style properties, as well as content, using JavaScript tools provided through the jQuery library.
Embedded HTML tags for greater control over text style
When creating a label, the string passed to it is interpreted as HTML, rather than plain text. That means that special HTML character codes can be embedded within strings, which the browser will evaluate when it renders the text. For example, we can include HTML codes for additional characters, such as × or ÷, or even to markup part or all of the text using embedded phrase tags such as <em> and <kbd>.
Of particular importance for text formatting is the inline container tag, <span>, which was first introduced in the notes the the Add Text! lesson.
By setting the <span>'s style attribute, we can modify the formatting of the subset of the label's text contained withing that tag, as illustrated in the following example:
label "This is a <span style=color:gold;>gold</span> word!", 50
Students are encouraged to explore the <span> tag in an Additional Exercise in the notes to the Label Formatting! lesson.
More about cascading style sheets
CSS is a defined as a style sheet language. That is, it sets the formatting rules according to which the browser renders the page. But what about CSS is cascading?
Every web browser has a basic style sheet that gives default style to any document. The author of a web page can override these formatting rules. The cascading aspect is simply a set of rules that determine which higher-priority/higher-level rules cascade down to lower levels.
For example, if you include a <span> within a <label>, some aspects of the label's formatting will override (i.e., cascade to) the <span>. But not all! For example, margin and padding do not cascade, but font-size and color do.
CSS Tutorials
CSS is a vast topic, but a powerful tool for web design and a source of boundless fun in coding class. This lesson provides only a simple introduction to some of the label-formatting options it makes possible. Individuals interested in learning more should consult additional resources, such as w3schools.com CSS Tutorial.
What can go wrong
Centering text vertically
Students may run into difficulties attempting center text when using the CSS height property. Centering text vertically is a much more complicated task than centering horizontally, and has been a challenge for HTML coders for years. There are a variety of potential solutions. When working with a single line of text, the simpliest approach arguably is to use the line-height property. For some additional notes, see this example program.
Syntax
A likely syntax error is that students will use = (equals) rather than : (colon) when defining css property/value pairs. Other common mistakes include forgetting to use camelCase translations of the coffeescript property names anmd failing to use quotes around non-numeric values; and not specifying units.
Default CSS units
Odd results can appear if one fails to specify the units for a given value, such as px or cm, when the default unit type differs from what the student has in mind. This bug appears most commonly in conjuction with line-height, which has the default unit of multiples of the "normal" line height for the current font-size. Students will need to explicitly add px if they want to set this with a specific value.
Missing spaces in labels
The label function interprets the string passed to it as HTML. A drawback is that if you want to include blank spaces at the beginning or end of a string, or of you want successive spaces within a string, you have to encode them using the HTML character. For example, contrast the label produced with the string " F U N " (in red) to the desired result (in green):
The latter label was generated using the string
" F U N "
Pedagogy
Content selection and sequencing of PencilCoder
Any introduction to web programming must make a choice regarding which technology to introduce first when teaching web programming. There is a logical argument to be made for starting off with HTML, as that underlies everything else. From there, moving to CSS is a fairly straightforward step. And then finally to JavaScript...
The approach taken in this curriculum—and inherently advanced by the Pencil Code platform—is to reverse this order. Pencil Code provides significant scaffolding to web programming, enablish students to immediately focus on its behavior/functionality aspects in authentic ways. And by adopting CoffeeScript rather than JavaScript, it provides an even lower barrier to entry.
However, at some point, a more complete understanding of web programming involves removing, or at least looking past, Pencil Code's impressive scaffolding. Students who have progressed this far in the PencilCoder curriculum posess a solid foundation in the logic and syntax of writing scripts, and are well-positioned to learn more about the broader world of web programming. This lesson is a first step in that direction. In the next lesson, students will learn even more about controlling CSS aspects of page elements, including how to gain access to various different page elements, using both JavaScript and jQuery. This background will ease the introduction to building full-blown web sites, as students will already be familiar with different aspects.

