Teacher's Guide: Conditional Logic!
Overview
This lesson focuses on a range of issues related to incorporating conditional logic in programs. It formally introduces students to the Boolean data type, the Boolean functions touches and inside, and the use of if and else statements.
More about the lesson
Conditional logic is an important component of flow control. We first encountered flow control with for loops (iteration). Conditional logic allows for branching, including conditionally exiting for loops using break statements (as illustrated in the lesson's coding snippets). In a later lesson, students will learn how to employ conditional logic to control the number of iterations in while loops.
if and else statements are intuitive and easy to use. The lesson mentions else statements in passing, rather than introduce them formally. Some additional instruction on that feature may therefore be warranted.
For students who continue to use Pencil Code block-mode for coding, note that the blocks palette contains two options (under Control):
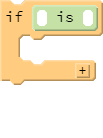

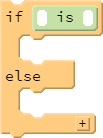
Two features of these graphical blocks merit attention. First, an if block can be converted to if / else by clicking on the + sign in the block's lower-right corner. An if / else block can likewise be extended to if / else if / else in the same manner. Second, both of the blocks in the palette look a little different than the examples provided in the lesson handout, owing to the inclusion of an expression involving is. is is a CoffeeScript alias for the comparison operator ==, which is used to test for equality. Comparison operators are the focus of the next lesson.
if statements can be written with any Boolean expression. However, this introductory lesson intentionally limits the options to two Boolean functions, touches and inside, to have students focus attention on the if statement itself rather than on the nuances of related features such as comparison operators (>, <, >=, <=) or logic operators (and, or, not). Additionally, layering in these topics separately helps students avoid getting into the habit of writing redundant code such as if touches(red)==true. These aspects of conditional logic will be explored in subsequent lessons, Comparison Operators! and Logic Ops!.
touches and inside are both sprite-specific functions, i.e., they can be called from any sprite through use of dot-notation. Both functions accept a single argument. touches can be used to test whether the calling sprite is in contact with a color, another sprite, or a coordinate (specified either as an array of center-based coordinates, e.g., r.touches [30,100], or an HTML coordinates object, e.g., r.touches {pageX: 478, pageY: 230}). inside also provides valid feedback when the argument passed to it is another sprite; however, it does not work with colors. (Passing a color to inside will always return false.)
When passed a color, touches by default evaluates with respect to the background canvas (i.e., in window). This occurs regardless of whether there is another sprite between the calling sprite and the background canvas, even if that sprite is obscuring the view of the color. To check if the calling sprite touches a color on another sprite, first call drawon to cause touches to respond to the other sprite's canvas, rather than window's. Additionally, be aware that the calling sprite (but not the target sprite) must be visible (i.e., not having been hidden using hide) for touches to work.
Finally, note that when using touches or inside, we must take into account timing issues related to animation queues. Because touches and inside return information about the current state of the animation, but are not animation functions in and of themselves (such as turnto and moveto), a call to either of these functions must be preceded by the statement await done defer().
Notes to activities
The first three activities are designed to give students practice with different applications of the newly introduced control statements and Boolean functions. The basic requirements for each of these activities is straightforward, but robust solutions will require additional effort. As in previous activities, students must experiment to get the right balance between the speed setting and the distance moved and/or degrees turned each iteration, and they will draw on previously-developed skills to construct and manipulate sprites. Additionally, students need to work out algorithms to keep the sprites inside the visible window (in RandomTurtlesInside), within the convex hull of another sprite (CagedBird), or a user-defined region (FencedIn). If not written correctly, the sprite will manage to escape, and as likely as not get stuck on the outside of the region, unable to get back in. A straightforward approach to address this last issue is to direct the sprite that has reached the edge of a region to turn in a known safe direction, such as with a call to turnto 0,0; but encourage students to explore potentially more interesting or "life-like" algorithms.
CagedBird requires students to work with multiple sprites. Failure to reference the intended sprite when calling sprite-specific functions is a likely source of coding errors. Note that this can be frustratingly difficult to debug if the default turtle is not visible, because it will seem like nothing is happening. Typically, the issue is not that "the function is broken", as students are apt to surmise. However, there is a Pencil Code bug associated with the touches function when used with a color argument, and it is for this reason that the CagedBird activity directs students to solve the challenge using the inside rather than touches.
When a sprite's mirror status is set to true, attempts to detect contact with a color using touches will fail. This bug is illustrated in this script. Note that touches will function correctly when the argument is a second sprite; this script illustrates an approach to coding the CagedBird program using touches that capitalizes on this fact.
When working with multiple sprites that follow the same logic, solution scripts can be shortened dramatically (or quickly extended to include more sprites) using for loops with arrays. For example, a student could attempt to incorporate something like the following in RandomTurtlesInside:
r = new Turtle red
b = new Turtle blue
g = new Turtle green
for t in [turtle, r, b, g]
  t.fd 25
  t.rt random([-30..30])
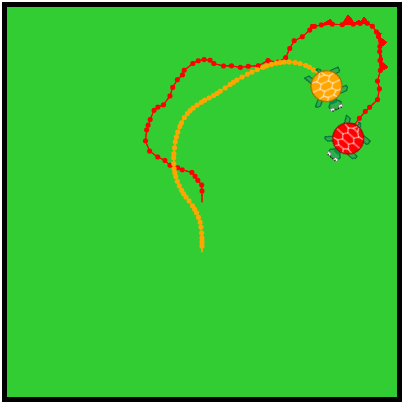
Efforts to employ this logic in a solution to RaceWithEnd are likely lead students to nest the foregoing snippet in another loop, as illustrated below. However, this programs a race in which all turtles may ultimately reach the finish line, rather stopping the race when the first sprite wins:
for [1..1000]
  await done defer()
  for t in turtles
    if t.touches(black)
      break
    else
      t.fd 25
      t.rt random([-30..30])
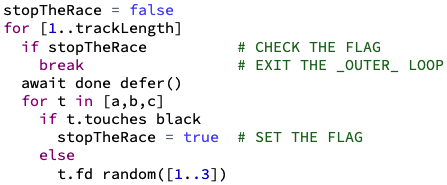
The issue is that the break statement exits the nested loop rather than the outer loop. With the tools students currently have at their disposal, exiting an outer loop based on conditional logic in an inner loop necessitates use of a variable which is initialized prior to the outer loop, evaluated in the outer loop, and updated in the nested loop. The code is nuanced, and quite challenging for most novice coders to write without significant scaffolding. Here's an example:
(JavaScript labeled statements provide an alternative approach to exiting an outer loop from within an inner loop; however, this language feature is not explored in the PencilCoder curriculum.)
It should be noted that nested loops are not required for RaceWithEnd. This alternative solution provides an example.
Additional activities
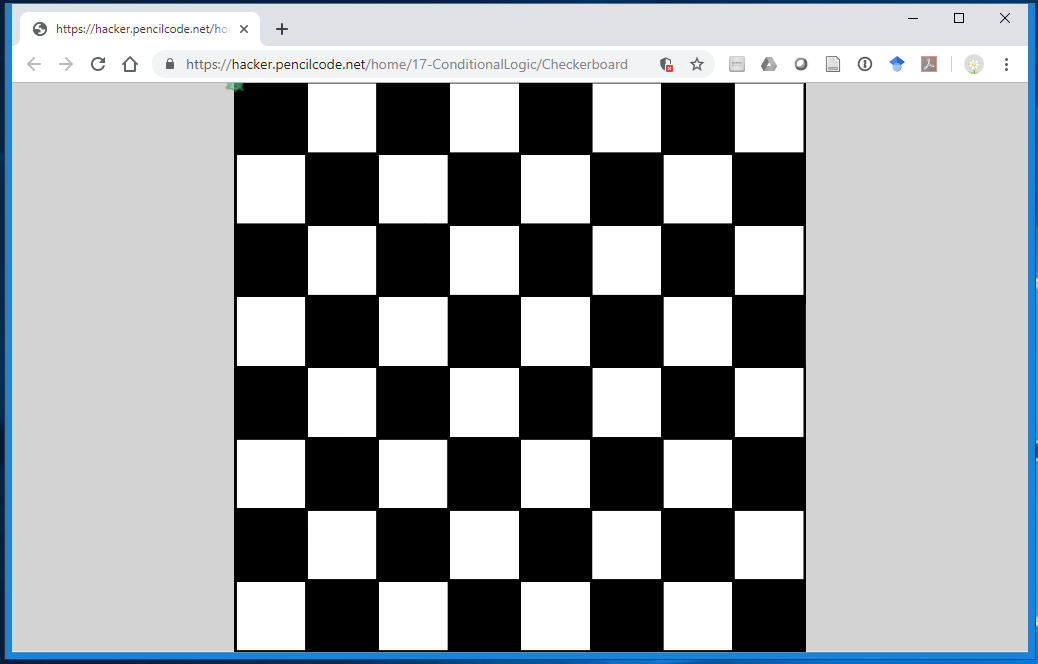
- Draw the largest 8×8 Checkerboard (with square tiles) that can fit in the visible screen.
- Code a game of TurtleTag using two turtles. Instruct one turtle to move randomly around in an enclosed region and have another, slower-moving turtle follow a few steps behind. When the follower
touchesthe leader, switch the turtles' roles. Chameleon: Draw randomly-colored dots or blocks on the background. Code the turtle to move randomly about the visible screen and to change color to match what is behind it.
- TriangulatingTurtles: Instruct three turtles to move randomly about the visible window, frequently redrawing the triangle formed between them.
Hint: when using
speed 0, calls toawait done defer()often slow animation down appreciably, in a way that allows for smooth movement. - FencedIn: Keep a sprite penned in a constrained area drawn on the background window, using
toucheswith a color argument.
Beyond the lesson
custom sprites, hit-testing, and clip
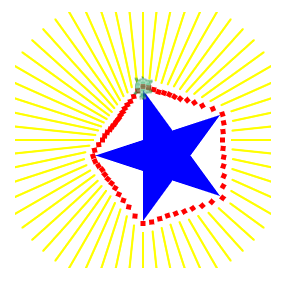
touches or inside both rely on hit-testing to determine the extent to which elements on the screen—sprites, the background window, and even specific colors drawn on the background or on a specific sprite—come into contact. Pencil Code's hit-testing computations are based on convex hulls. A convex hull is polygon; typically, it is set to the smallest one that will fit around the shape drawn on a sprite. The default turtle's convex hull is illustrated in the following diagram.
For turtles, the convex hull is automatically generated. For custom sprites, the situation can be more complicated. The remainder of this section identifies some nuances of hit-testing when working with custom sprites.
A custom sprite's hull is set when it is instantiated (i.e., first created, using the Sprite constructor), with values based on what is then visible. In the simplest case, when creating a custom sprite with a background color, e.g., r = new Sprite red, the sprite's convex hull is set to the square region that comprises the sprite. However, when a sprite's initial canvas is transparent (a common choice when defining a custom sprite), the hull is set to a value of "none". A sprite's convex hull is not automatically updated after subsequent drawings are made, so hit-testing with a custom-drawn sprite that was created with a transparent background will be inaccurate. If the sprite is the argument of a call to a function like touches called from another sprite, it will always return false. Attempts to call a function like touches from the sprite with an empty hull will result in an uncaught TypeError, causing the program to crash.
A sprite's convex hull is not automatically updated, but we can instruct Pencil Code to do that using the clip function. For details on the clip function, see the Pencil Code Clip Reference.
Calls to clip should be made after the code for drawing that sprite is complete, i.e., typically after the call to drawon window. Follow the call to clip with a call to await done defer(), to ensure subsequent functions such as inside and touches base their results on the updated hull.
As noted in Notes to Images!, you can modify an image sprite, such as using color erase to effectively crop the image. The actual dimensions of the image-sprite will remain unchanged (as can be verified by viewing the values returned by turtle.width() or turtle.height()). However, calls to clip will change the convex hull for the Sprite, which is what impacts results of hit-testing.
then
The CoffeeScript keyword then can be used to turn if statements into one-liners, rather than having to include an indented block on the next line. For example,
if touches(red) then rt 90
This use of then is not dissimilar from its use with for loops, as described in the notes to the For Loops! lesson. Use of then enables entering if statements in the command line of the Pencil Code test panel. Additionally, for simple conditional statements, use of then has the potential to simplify coding and improve readability.
Postfix conditionals
As an alternative to using then to code if statements as one liners, CoffeeScript also allows for postfix conditionals. This simply involves reversing the order of expressions in an if statement, e.g.,
fd 100 if touches blue
Note, however, that JavaScript does not allow use of this syntax.
Not having not
Students might find themselves wanting to use simple if statements to cause behavior when functions touches and inside return false. An example of this arises in the illustrated solution to the CagedBird activity. In a later lesson on logical operators, student will learn about the not operator, enabling them to write code such as:
if not inside(window)
  turnto 0,0
Until that point, however, students will have to resort to other options, typically involving if / else. A convenient solution is to use a comment in the body of the if statement, or some other statement that will have no effect on program execution (such as pause 0).
if inside(window)
  #do nothing!
else
  turnto 0,0
hidden
hidden is a sprite-specific Boolean function that returns whether or not a sprite is currently visible: e.g., if hidden() then st()
switch
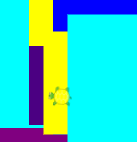
switch statements provide a convenient way to consider multiple different conditional values, rather than using a chain of nested if / else statements. As noted in coffeescript.org, CoffeeScript offers simplified syntax for using the JavaScript switch function, such as illustrated by the following example, which determines which direction a turtle should turn based on which (colored) edge of the screen it touches:
switch will be explored in greater depth in the Notes to the Event Objects! lesson.
What can go wrong
Misused break statements
A break statement typically goes inside an if or else block. However, its purpose is to exit the for loop. Students frequently confuse this issue, attempting to "exit" an if statement using break. The if statement only gets exited if it is contained in a for loop. This underlying relationship between break statements and for loops is reflected by the fact that an if block can only contain a break statement if the if statement is nested in a for loop.
"touches (or inside) doesn't work"
There are several potential causes for this type of bug, most of which involve student error. The most common mistake involves the animation queue. Make sure that students include appropriate calls to await done defer() prior to calling functions that return information about the current state of the animation queue. Another common coding error is to omit reference to a specific sprite using dot-notation. Other sources of failure typically owe to the nuances of the usage of these functions. For example, both the calling sprite and the target must be visible for touches to work.
However, there is a Pencil Code bug associated with use of touches with a color argument when the calling sprite's mirror value is set to true. See the discussion in the Notes to the CagedBird Activity for details.
Inaccurate hit testing with custom sprites
When creating a custom sprite, it is common to set the background color to transparent. However, while this choice sets the initial dimensions (width and height) of the sprite, it establishes an empty convex hull. As a result, calls to touches or inside will always either yield false (if the transparent-background sprite is passed as an argument to touches) or result in a TypeError (if the transparent sprite calls touches) that causes the program to crash at runtime. Fortunately, calls to clip reset the convex hull of the sprite (which used for hit-testing), and will remedy this issue. As a rule, clip should always be called after creating a custom sprite with a transparent background.
Technicalities
Expressions, statements, and functions (in CoffeeScript)
In math, an expression is a sequence of numbers and operators that represent a number, such as x*x+5. In coding, we can extend this definition to say an expression is a sequence of variables and operators that represents a value of a single data type, such as "This is " + "a string.".
A statement is the smallest standalone element of a program, such as fd(100) or x = x+5. Statements consist of one or more expressions. A line of code involving assignment is always a statement (or, at least, it contains a statement—more on this below). Whether a function, in and of itself, is a statement depends on what that function does. Functions that modify an object or a variable reference are statements. Functions that compute a value and return it (but otherwise don't affect the state of the program) are expressions.
However, the line between expression and statement is blurred in CoffeeScript, because almost everything in CoffeeScript is an expression. The most notable implication of this CoffeeScript design feature is that statements involving assignment are themselves expressions. For example, the assignment y = 5 is a statement in which y gets assigned a number value; but it is also an expression that evaluates to 5. By extension, then, a line of code involving assignment will not necessarily be a statement (which is the case in many other languages, such as Java), though it will always contain a statement. It is possible to have an expression that contains an assignment, such as 6 + y = 5 (this expression evaluates to 11).
This curriculum does not encourage writing expressions that embed assignment statements. Expert coders often value this flexibility; however, for everyone else it more often leads to programming bugs that are really hard to identify, as will be discussed in the notes to the next lesson.
Inner workings of clip
Each Pencil Code sprite object references a bitmap of colors with a transparency variable called alpha. As described in the Notes to the Colors! lesson, as alpha ranges from 0 to 1, the color changes from fully transparent to opaque. clip mathematically determines a bounding convex polygon around bitmap pixels with alpha greater than 1/8, and sets the hit region to that polygon.
It is possible to manipulate a sprite's convex hull directly by passing a properly-formatted string to the sprite's css method. For example, the following code creates a sprite with a hit region in the shape of a triangle based on the points (0,-25), (-50,50), and (40,25). These coordinates are measured from the sprite's center, with positive x and y values measured to the right and down, respectively.
mySprite = new Sprite
mySprite.css turtleHull: "0 -25 -50 50 40 25"
Manual construction of a convex hull for a non-convex shape (a star) is illustrated in this script:
