Teacher's Guide: For Loops!
Overview
This lesson is the first of four which will explore various aspects of iteration with for loops.
The random function is introduced as it lends itself to creative and fun use in an iterative setting.
More about the lesson
For loops allow us to repeat statements in a program again and again. The lesson emphasizes the term iteration as well as its verb form iterate, words that describe this repetetive process succinctly and are essential vocab terms going forward.
Notes to activities
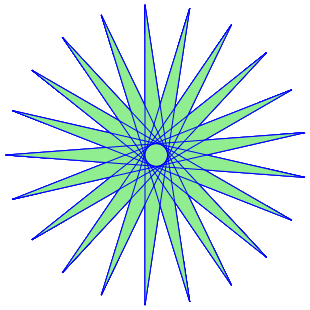
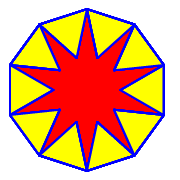
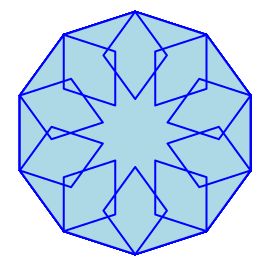
The Square, Decagon, and Star activities are repeats of previous activities (from Line Art!), but this time students should use for loops to express the code more succinctly. There are multiple algorithms for drawing a Star, a few of which are illustrated below. The choice of algorithm in creating a Star will be revisited in the Teacher's Notes to the Variables! lesson.
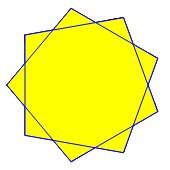
Iteration offers students tremendous opportunity to get creative. Students should be encouraged to explore. The first three Spirograph examples illustrate repeated use of some regular polygons, but any shape could be used, including even minor alterations to regular polygons. For example, the following shapes were created by altering the length of a single side in a hexagon (the one on the left from drawing it shorter than the other 5 sides, and the one on the right longer).
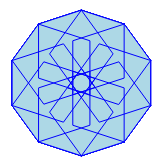
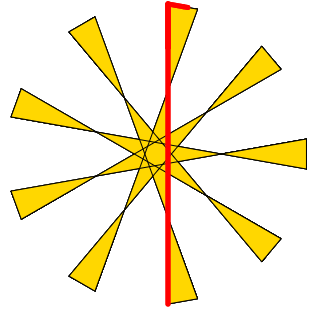
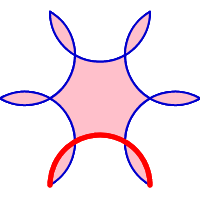
However, students can make incorporate just about any design in a loop to create a spirograph. The following designs arose from repeating relatively arbitrarily-chosen lines, arcs, and turns (the repeated pattern is highlighted in red). The pattern on the right is based on use of a semicircle, the same underlying shape used to create the flower-like spirographs illustrated on the handout.
While one can work through the math to see if repetitions of a random shape line up nicely (thereby yielding radial symmetry, as they do in the examples shown above), the calculations can quickly become onerous. Contrary to the emphasis on identifying the underlying math expressed in other lessons, in this case students should simply try things out, and rely on guess and check to accomplish their desired results.
Another approach to creating interesting designs is to use layering of different-colored patterns, as illustrated in the following examples which primarily make use of circles.
This unit introduces several aspects of the random function, including some technical details regarding calling random with a single integer argument. Those nuances are not essential for this lesson, but may take on greater importance in subsequent lessons. The ErraticTurtle activity is the primary opportunity students are presented to use the random function with integer arguments in this lesson. The second illustration for OceanView subtly suggests another use, i.e., making waves of varying size.
The GrassyField activity will be revisited in Variables!, at which point students will be able to make the blades have random lengths and slope.
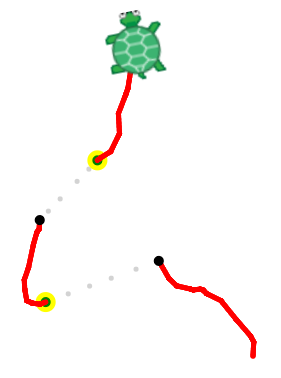
Students don't yet have the coding tools to ensure that the randomly moving turtle in the ErraticTurtle activity will remain in the screen. These skills will be developed in later lessons, Conditional Logic! and Comparison Operators!.
Additional activities
- RandomStars: Use
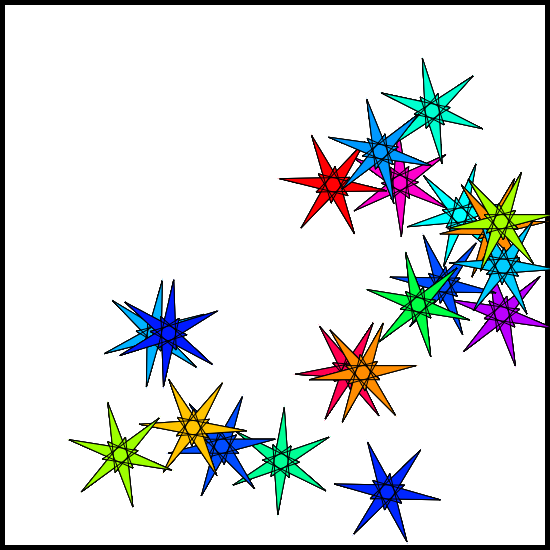
randomto position copies of spirographs at random locations around the screen. Do not rely on the dropdown optionrandom(position)to position your stars. Rather, come up with an algorithm to position stars around the screen that solely relies on calls torandomwith integer arguments, as described in the lesson. This provides a good opportunity to think computationally! - WarpingTurtle: Create an enhanced version of the ErraticTurtle, making the turtle periodically hide and then reappear a few seconds later in another location. For a slightly better effect, use the
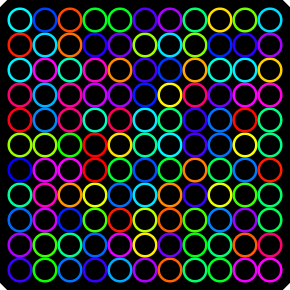
fadeOutandfadeInalternatives tohideandshow. - BoxIllusion: Code your own variant of the following optical illusion, in which parallel lines and congruent boxes look anything but! Your solution should include nested loops, i.e., loops within loops. Begin by coding a for loop that draws the bottom row of boxes. Then put that loop within another loop that repeats this a number of times, once for each row.
Beyond the lesson
Nested loops
A common structure used in coding is to put a loop within a loop, referred to as a nested loop. The lesson avoids formal instruction of nesting, as it can be a bit too much for some students to process at this point. However, use of nested loops is straightforward, especially in the creation of spirographs. Students may make the jump on their own as they work to complete the Spirograph activity.
Nested loops arise in many situations. Among other things, nested loops are useful for creating grids, such as this grid of dots:
However, as the source code for that solution notes, creating grids using nested loops is much more straightforward when using Cartesian coordinates along with functions and other coding constructs (notably variables) that support use of coordinates. For this reason, these types of activities are delayed until the Coordinates! lesson.
Code blocks
The statements included within a for loop, indicated by indenting, are called a block of code. for loops introduce situations where we need to modify the indentation of our code. Keyboard shortcuts CTRL+] and CTRL+[ are useful to indent and dedent lines of code.
Broader use of random
The random function takes a variety of parameters types. The lesson focuses on use of random with the variable color (which simply points to the string, "color"), but it also introduces the use of random with integer arguments. As the lesson notes, random(100) selects a whole number between 0 and 99. This makes sense if you think of the random(100) as selecting from the first 100 values beginning with 0, not from the set of values 1 to 100. Though not immediately intuitive to students, beginning counting with 0 is standard in computer programming.
Often students will want to generate random numerical values in ranges that do not start at zero. For example, they might want to generate a random side length for a polygon between 50 and 150. This can be accomplished using some simple math, i.e., 50 + random(101) (note that 50 + random(101) could only yield values up to 149). Similarly, a turtle could be directed to turn up to 90° in either direction using the statement rt -90 + random(181). However, the random allows students to select values from a range of integers directly by calling random with two integer arguments. random(50,101) will select a number between 50 and 100, inclusive.
Some additional arguments to the random are revealed by the drop-down menu of the coding block; these and other options are described below.
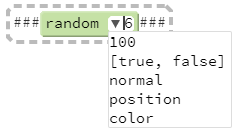
100- This usage is described above. In technical terms, the value is chosen from a uniform distribution (i.e., each integer value is equally likely to be selected).
[true, false]- This syntax illustrates that we can use
randomto select an element from any array of values, a feature that will be discussed in Arrays! lesson. In the example provided in the drop-down menu,randomselects a Boolean value,trueorfalse. Boolean values will be introduced in the Conditional Logic! lesson. normal- A random value is selected from a standard Normal distribution. Values closer to 0 are more likely to be chosen. The standard Normal distribution folls a bell shape, with nearly all values (99.7%, to be more or less exact) will be within -3 and 3.
position- A set of values is randomly selected from the range of x, y coordinates in the visible screen, and returned as an HTML location object. This usage of
randomwill be introduced in the Chase Other Sprites! lesson, with additional aspects of it introduced after the introduction of objects, in Custom(ized) Objects! color- This usage is described above. However, note that when using the
colorargument, the result is not selected from the predefined colors listed on Pencil Code color reference; rather, it is instead one of 360 HSL (hue, saturation, lightness) codes. HSL codes are discussed in the teachers notes for the Colors! lesson.
One additional additional possibility is calling random with no argument at all, i.e., random(). As with all function calls that do not involve an argument, explicit use of parentheses is required in this case. random() generates a value from a uniform distribution in the range [0,1), returning a value greater than or equal to 0 and less than 1.
then / calling for in the test panel
As noted in the notes to DotArt!, the command line embedded in the test panel only allows for single-line entries. Thankfully, mutliple statements can be entered on a single line, by ending each one with a semicolon. To code a for loop, use the CoffeeScript then keyword, followed by all statements to be included in the for block, separated by semicolons. For example,
for [1..8] then dot blue; rt 45; fd 100
Both then and semicolons can also be used more generally, enabling writing multiple statements with a single line of code.
What can go wrong
Undesired parsing of function calls
On occasion, CoffeeScript with not interpret function calls as the coder intends when parentheses are not explicitly shown. This can happen when a function accepts multiple arguments, and the user enters a function call for one of those arguments. For example, this pitfall arises from the code
pen random color, 10
After this code is run, the pen will not be the specified thickness. We can see the source of the problem in block mode, which shows that CoffeeScript interprets the code incorrectly as this:

rather than

10 as a second argument to the random function. However, because color is the first argument, the compiler simply ignores that second argument. This can be a particularly frustrating error, as it does not lead to an error message! Thankfully, the fix is as simple as making the parentheses explicit:
pen random(color), 10
Inconsistent indentation
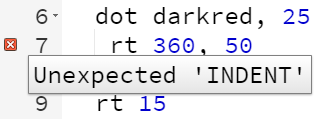
Coffeescript is a whitespace sensitive language, meaning it uses spaces and newlines to separate elements of a script. Multiple lines of code that belong together, such as in a for loop, are known as code blocks; these are denoted through indentation. By default, in text mode, Pencil Code indents two spaces. The CoffeeScript compiler doesn't impose a standard unit of indentation, so students can vary this. The key is to be consistent, as mixing indentations will generally lead to errors.
Mis-filling with fill
fill adds colored shading based on the path the turtle has taken since the most recent call to pen. If pen is called again along the way to designing a shape—such as to change pen color or thickness—the result is unlikely to be what was desired. Often, the best approach is to repeat the pattern once, first going through the shape using pen path, followed by fill, and then repeating using the colors of the lines that should be superimposed. For example, consider the code used to draw and fill the following shape:
Exceeding available memory
When working at speeds other than speed Infinity, Pencil Code operates in a queue-based animation manner. The animation queue will be discussed in later lessons, beginning with Add More Turtles!. The relevant issue here is that by default Pencil Code creates the entire queue for each sprite, prior to animation commencing on screen. An error can arise with for loops if the user specifies an excessive number of iterations, as the application will run out of memory. For example, the following code cause the program to crash:
When the program crashes owing to excesssive iterations, Pencil Code will show one of the following two messages:


The difference is not important for the purposes of the lesson—the underlying issue is largely the same, as is the solution. (An explanation is provided in the Technicalities section of this document, below.)
Pedagogy
This lesson is the first of many that explore tools which allow the programmer to control the flow of execution of statements in our code (i.e., program "flow control"). Given the importance of iteration to coding, this and the following three lessons are largely devoted to thoroughly exploring that topic. Activities in subsequent lessons, which are ostensibly focused on Sprites, provide ample additional opportunity for additional practice with loops, before moving on to conditional logic, and later, functions, events, and error handling.
Technicalities
Arrays
The use of a for loop necessitates introducing the concept of an array, e.g., the [1..3] in the for loop block:

This is one of the few exceptions to this curriculum's goal of always identifying and explaining new concepts or structures as they are introduced. However, the drawbacks of the alternatives are outweighed by the benefits of making the exception. A discussion of arrays at this point would be an unnecessary distraction. Another alternative would be to make use of while loops. HJowever, this would necessitate introduction of Boolean expressions and conditional logic.
Slipping in arrays in this limited use is a small compromise. Students don't realize it is an array, but that is explained later, in the Arrays! lesson. Arguably, student use of array notation (both the brackets and the three-dot "splats") eases the transition later.
"the computer got stuck in calculations" warning
The What can go wrong section identifies two different error messages that can appear when loops are so big that a program becomes too large for Coffee Script to compile. The message "Maximum call stack size exceeded" indicates that the computer exceeded the amount of storage available to the program, causing the program to crash. The more cryptic warning "the computer got stuck in calculations" arises from a fail-safe built into Pencil Code that stops programs when they take too long to progress. For example, suppose you have an infinite loop of turtle motions. In such a case, nothing will seem to happen, as the computer tries to build animation queues. The computer will just hang the tab in the browser. To detect this error, Pencil Code periodically tests to see if the script is taking too long to start animation (and all the while, "blocking message dispatch") and if so, interrupts it by throwing an error.
Variable Scope
Variable scope refers to the visibility of a variable at different points in a program. It is a topic that students will encounter when defining custom functions.
In some languages, such as Java, blocks of code (such as contained in a for loop) create variable scope. As a result, in those languages, a variable declared in the body of a loop ceases to exist after the loop ends. However, this is not the case in JavaScript (nor in CoffeeScript): a variable created in a for loop can continue to be referenced after the for loop has completed.
